
On this page0
Core Payroll Cycle
Review, Update, Approve & Close Payroll Runs
How to use InstaRoll to review payroll data, make real-time updates, validate payslips, approve and lock payroll, access post-payroll outputs, and configure payroll calendar pay dates — so a payroll admin can complete the cycle with fewer clicks and less manual rework.
-
Open the current payroll run from the payroll dashboard
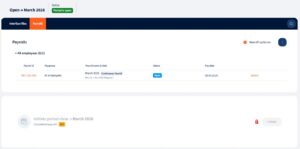
- Go to the Open Payroll screen where the current payroll run is listed.
- Click Select to open the payroll.
- The Payroll tab is the main workspace for reviewing and managing the payroll run.
- Confirm you are in the correct payroll run before making any changes.
-
Review the payroll summary widgets

- Check the Insights widget section for a high-level payroll overview.
- Review key metrics such as current payroll status, number of employees, net pay, employee contributions, and total payroll costs.
- Use these figures to quickly confirm whether the payroll run looks reasonable before drilling into details.
-
Inspect input changes and gross-to-net breakdowns
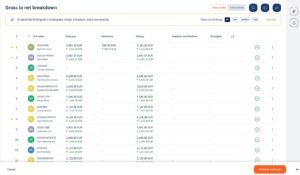
- Open Input Changes to review what has changed in the current period.
- Expand an employee record to compare the previous period versus the current period.
- Navigate to the Gross to Net breakdown section to see individual changes at a detailed level.
- Identify whether each change is above or below the previous value.
- Click into a change to deep dive into the underlying details when needed.
-
Open an employee row to review inputs and calculations
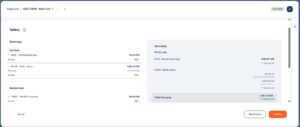
- Click an employee row to open the detail modal.
- Review payroll inputs on the left-hand side.
- Review payroll calculations influenced by those inputs on the right-hand side.
- Use this view to understand how employee data affects payroll outcomes before editing anything.
-
Update payroll inputs directly inside the payroll run
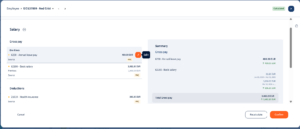
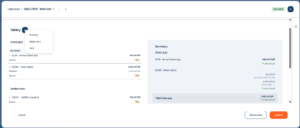
- Add or modify pay elements directly within the payroll run without leaving the screen.
- Common updates include earnings, deductions, taxes, and contributions.
- Make changes directly in the employee record or payroll run view.
- Confirm that updates are reflected immediately in the payroll calculations.
-
Correct employee data and apply the effective date
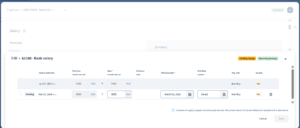
- Locate the pay item that needs correction, such as a special allowance.
- Update the value directly in the payroll run.
- Select the appropriate effective date for the change.
- If the change occurs mid-period, expect a proration record to be created.
- Click Save and confirm the update to trigger recalculation.
-
Verify real-time recalculation after changes
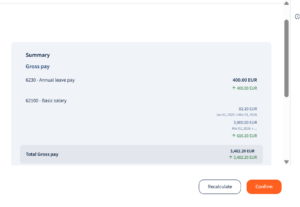
- After saving, confirm that calculations are triggered immediately.
- Review the updated variance and payroll impact right away.
- Use the real-time calculation view to validate that the change was applied correctly.
- Avoid unnecessary backtracking or restarting the payroll process for all employees.
-
Understand where payroll changes can originate
- Recognize that payroll changes may come from multiple sources: the payroll run screen, an employee card updated by a teammate, or integrated systems feeding payroll data.
- Monitor the screen for real-time updates and operational status.
- Use the visible calculations to confirm the payroll is still accurate after each change.
-
Review payslips and complete payroll audit checks
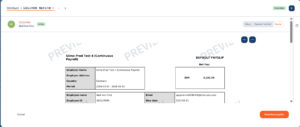
- Navigate to the Payslip section after updating payroll data.
- Open each payslip to verify accuracy.
- If needed, return to the payroll data and make corrections.
- Download payslips if required for audit or review purposes.
- Close the payslip window and move to the next employee until the audit is complete.
-
Approve and lock the payroll run
- Once all checks are complete, click Approve and Lock.
- Confirm the action to finalize the payroll run.
- This replaces multiple approval steps with a single final action.
- After approval, the payroll run is closed and ready for post-payroll processing.
-
Access post-payroll actions and reports
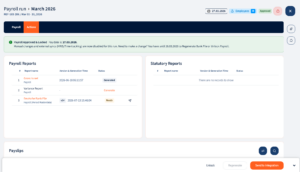
- After approval, go to the Actions tab.
- Review available post-payroll items: payroll reports, statutory reports, bank file, and payslip previews.
- Check which reports are already generated and which are still generating.
- Verify that the correct reports are available based on system and legal entity configuration.
-
Review bank files, statutory reports, and payslips
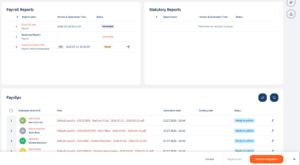
- Open the Bank File section to confirm the file generated at approval.
- Review Statutory Reports before transmission or filing.
- Use the Payslip section to preview approved payslips.
- Confirm that all outputs match the finalized payroll run before proceeding with external submission or distribution.
-
Regenerate the bank file if needed after closure
- If the payroll run is already in closed state, use the Regenerate function to regenerate report with master data changes.
- Currently only Bank file can be regenerated if it was rejected due to some incorrect master data. Master data can be updated from employee card or in the payroll run directly and then bank file can be regenerated.
- Use this option only when the payroll is closed and you must regenerate the bank file to correct any master data updates.
-
Set up payroll calendar pay dates in advance
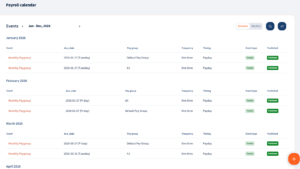
- Go to Payroll Settings and open Payroll Calendar.
- Use this feature to add pay dates in advance for the full year.
- This reduces manual entry during each payroll run and supports automated closure.
-
Create or edit payroll calendar events
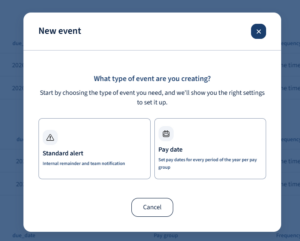
- Review the existing payroll events for the current year.
- Click an existing event to edit it if the pay date needs to change.
- Create a new event if a pay date has not yet been configured.
- Use this area to maintain accurate payroll scheduling throughout the year.
-
Configure a new pay date event for InstaRoll
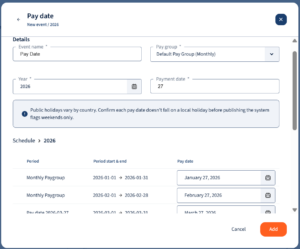
- Add a new event for the first-time InstaRoll setup.
- Enter the paydate event name.
- Set the Paygroup — check whether your payroll cycle is set up as All Employees or Paygroup specific. If it’s set up as All Employees, select All Employees only from the picklist; otherwise select the specific paygroup. Selecting incorrectly means the bank files will not have correct info.
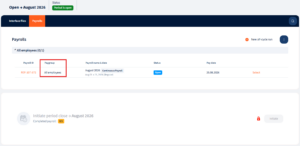
- Enter the Year and Payment date.
- Set the default pay date for the relevant periods.
- After all periods have default dates, review whether any pay date falls on a weekend or holiday, then change it manually to adjust that specific period’s pay date.
- Save the configuration so it can be used in payroll runs.
-
Update pay dates when payroll timing changes
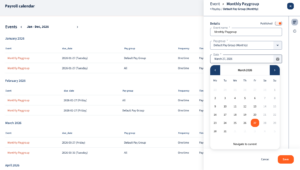
- Edit existing pay dates if payroll cannot be processed on the planned date. Always update before the due date — on the pay date, the payroll run gets closed automatically.
- Update the calendar to reflect the new processing schedule.
- Ensure the revised pay date is accurate before the payroll run reaches closure.
-
Allow payroll closure to occur automatically
- Confirm that the configured pay date is applied to the payroll run.
- On the scheduled date, the payroll run will close automatically.
- Use this automation to reduce manual closure steps and avoid uncertainty about when to close the run.
Cautionary notes
- Do not approve and lock until all payroll data, payslips, and reports have been reviewed. Clicking Approve and Lock finalises the payroll, and if the pay date is reached, it will also close the payroll run.
- Verify effective dates carefully when making mid-period changes, as they may create proration records.
- Confirm employee-level changes before saving, especially when updates come from integrations or another team member.
- Review statutory reports and bank files before transmission to avoid downstream errors.
- Use regenerate cautiously after closure, and only when a replacement bank file is truly required.
- Keep payroll calendar pay dates current so automated closure occurs on the correct date, and avoid early closures when your payroll is not ready.
Tips for efficiency
- Use the dashboard summary widgets first to quickly spot anomalies before drilling into details.
- Make changes directly inside the payroll run for ease of managing pay data. Master data still needs to be updated on the employee card — you can click an employee name link to jump directly to the employee card.
- Real-time recalculation helps validate updates immediately instead of waiting until the end of the process.
- Review pay data, calculations, or payslips in sequence using the arrow or employee picker to move to the next employee.
- Set up the full-year payroll calendar in advance to reduce repetitive manual work. Use it to set internal events, which then appear on the calendar widget on the payroll dashboard.
- Standardize pay date event names and paygroup selection to make calendar maintenance easier.
Processing an Off-Cycle Payroll Run
How to create, process, and lock an off-cycle payroll run when InstaRoll is enabled — capturing payroll data in the correct run, preventing cross-impact between open payroll cycles, and completing off-cycle payments accurately.
-
Confirm the payroll run status before creating an off-cycle
- Verify whether the regular payroll run is approved and locked before starting an off-cycle.
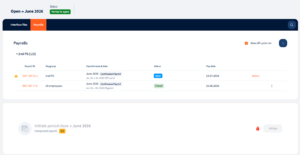
- If the regular payroll run is still open, do not create an off-cycle yet. Open a new off cycle run only when regular payroll run is in approved state.
- Off-cycle processing uses the same payroll experience — the key difference is how the run is processed and isolated.
-
Create the off-cycle run from the payroll screen
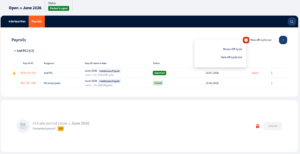
- Start the off-cycle creation process from the payroll interface.
- Select the employee group for the off-cycle.
- Choose the employees who should be included in the off-cycle run.
- Continue only after confirming the correct employees are selected.
-
Enter and lock the pay date upfront
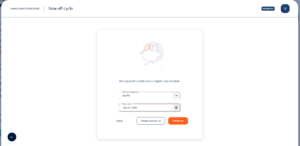
- Provide the pay date before creating the off-cycle run.
- Select a pay date that matches when the employees will actually be paid.
- The pay date is not editable after selection.
- Double-check the date before proceeding, since it will be used for the bank file and payroll output.
-
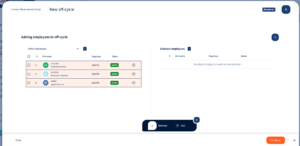
Select the employees to include in the off-cycle
- Choose the specific employees you want to pay in the off-cycle run.
- Confirm the selected associates are the only ones intended for this payroll.
- Create the off-cycle run for those employees once the pay date and group are confirmed.
-
Add only the pay data needed for this off-cycle
- Review the available changes and determine what should be included in this run.
- Add only the data relevant to the off-cycle payment.
- Avoid processing data that already belongs to another open payroll run.
- If needed, add a one-time earning such as a bonus or performance payment.
-
Save the pay data and verify automatic calculation
- Click Save after entering the off-cycle pay data.
- Confirm that InstaRoll automatically calculates the updated pay.
- Review the gross pay and net pay values to ensure the bonus or other earnings were applied correctly.
- Verify the associate’s payroll details reflect the intended change.
-
Approve and lock the off-cycle payroll run
- Once the off-cycle data is correct, click Approve and Lock.
- Confirm the payroll run is closed for the selected pay date.
- Use the available reports to review the finalized payroll details.
-
Download or transmit payroll outputs
- After locking the run, download the bank file if needed.
- Send the file through integrations or manually deliver it to the bank.
- Ensure the output matches the approved pay date and payroll details.
-
Keep only one payroll run open at a time
- Never keep two payroll runs open simultaneously if they contain overlapping employee data.
- If you need to make changes, unlock only one payroll run at a time.
- Keep the other payroll runs locked to prevent data from crossing between runs.
- Re-lock the payroll run after making and verifying changes.
-
Validate that payroll data stays isolated between runs
- Check the employee record to confirm only the intended payroll data appears in the correct run.
- Verify that off-cycle data does not appear in the regular payroll run.
- Confirm that regular payroll data does not get applied to the off-cycle run.
- Use this validation step whenever payroll runs are being edited or reviewed.
Cautionary notes
- Do not create an off-cycle while the regular payroll run is open. This can cause the same employee data to appear in multiple runs.
- Do not open two payroll runs at the same time. Only one should be open for editing while the others remain locked.
- Do not change the off-cycle pay date after it is set. The selected date is final and will be used on payroll outputs and bank files.
- Always verify employee selection before saving. Incorrect employee selection can lead to payment errors.
- Lock the payroll run after changes are complete to prevent unintended updates from affecting other runs.
Tips for efficiency
- Lock the regular payroll run before starting any off-cycle to keep data clean and isolated.
- Decide the pay date first so you can complete the off-cycle setup without rework.
- Use one-time earnings only for the off-cycle items that truly need to be paid separately.
- Review gross and net pay immediately after saving to catch issues early.
- Keep a simple rule for payroll admins: one open run, all others locked.
Reports & Integration
Transmit Payroll Output Reports to Integration / Outbound Systems
How to prepare payroll output reports, lock the payroll run, and transmit eligible files to the outbound/integration system — plus how to regenerate reports and resend files when changes or transmission issues occur.
-
Complete all payroll changes before transmission
- Finish all day-to-day payroll calculations and corrections before sending any output files.
- Review the payroll run carefully to ensure no further changes are expected.
- Avoid transmitting incomplete or outdated data, as this can create downstream complications, rejections, or failures in integration systems.
-
Review and validate statutory / payroll reports
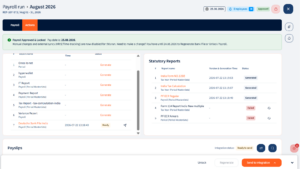
- Open the Actions tab under Payroll and access the Statutory Reports section. Review reports in real time to confirm the data is accurate.
- Download reports if needed for closer inspection.
- If errors are found, correct the payroll data and regenerate the report.
- Each regeneration creates a new report version (for example, V1, V2, etc.).
-
Approve and lock the payroll run
- Once reports are validated and payroll is finalized, go to the Payroll tab.
- Select Approve and Lock to freeze all payroll inputs.
- Locking prevents further changes and is the preferred state before transmitting reports.
- Use this step to ensure only complete and finalized data is sent to integration systems.
-
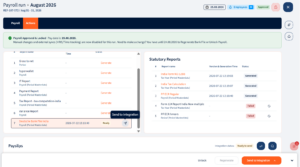
Identify reports ready for integration
- After locking, check which reports display the Send to Integration option.
- Reports that are generated successfully will show a ready status for transmission.
- If a report failed, the Regenerate option may still be available even after approval and lock.
- Work with support to resolve any report-generation issues before attempting transmission.
-
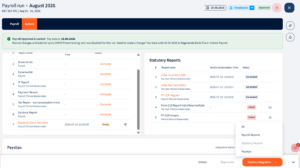
Send reports individually or in bulk
- Review the version history of each report to see which files have already been sent.
- Send reports one at a time if you need to control transmission by file/version.
- Use the bulk Send to Integration button to transmit all eligible unsent reports at once.
- The system will only send files that have not already been transmitted — previously sent files will not be resent, preventing duplicate transmission.
-
Handle resend scenarios when changes are required
- If the outbound system did not receive a file, or a payroll change is required, unlock the payroll before the outbound pay date.
- Payroll can be unlocked up to one day before the pay date.
- Make the necessary payroll changes, then approve and lock the payroll again.
- Regenerate the affected report so a new version is created for transmission.
-
Regenerate and retransmit updated report versions
- After making changes and relocking the payroll, regenerate the report that needs to be resent.
- Confirm the new version is created successfully.
- Once regenerated, the report will again show the Send to Integration option.
- Use the bulk send option if multiple regenerated reports are ready.
- Verify that the newly generated version is the one transmitted to the integration system.
Cautionary notes
- Do not transmit reports until all payroll changes and validations are complete.
- Once a file is sent, avoid making further changes unless you intend to unlock, update, regenerate, and resend.
- Be aware of the payroll unlock cutoff relative to the pay date — unlock is allowed only up to minus one day before the pay date.
- If a report fails after locking, resolve the issue before sending to avoid incomplete or incorrect output.
- Confirm whether a report has already been sent before using bulk transmission to prevent confusion, even though the system avoids duplicate sends.
Tips for efficiency
- Validate reports immediately after generation so issues can be corrected before lock.
- Use report versioning to track changes and confirm you are sending the latest file.
- Use bulk transmission when multiple unsent reports are ready to reduce manual effort.
- Keep a quick checklist: finalize payroll, review reports, approve and lock, then send to integration.
- If a report must be resent, regenerate only the affected version instead of reprocessing everything unnecessarily.
Your response has been submitted — it helps us make these pages better.