


 Login
Login

Leaves
Last updated on April 27, 2023
In this module, you can view, approve and reject transaction requests for leaves, add new leave transactions and also see and edit balances.
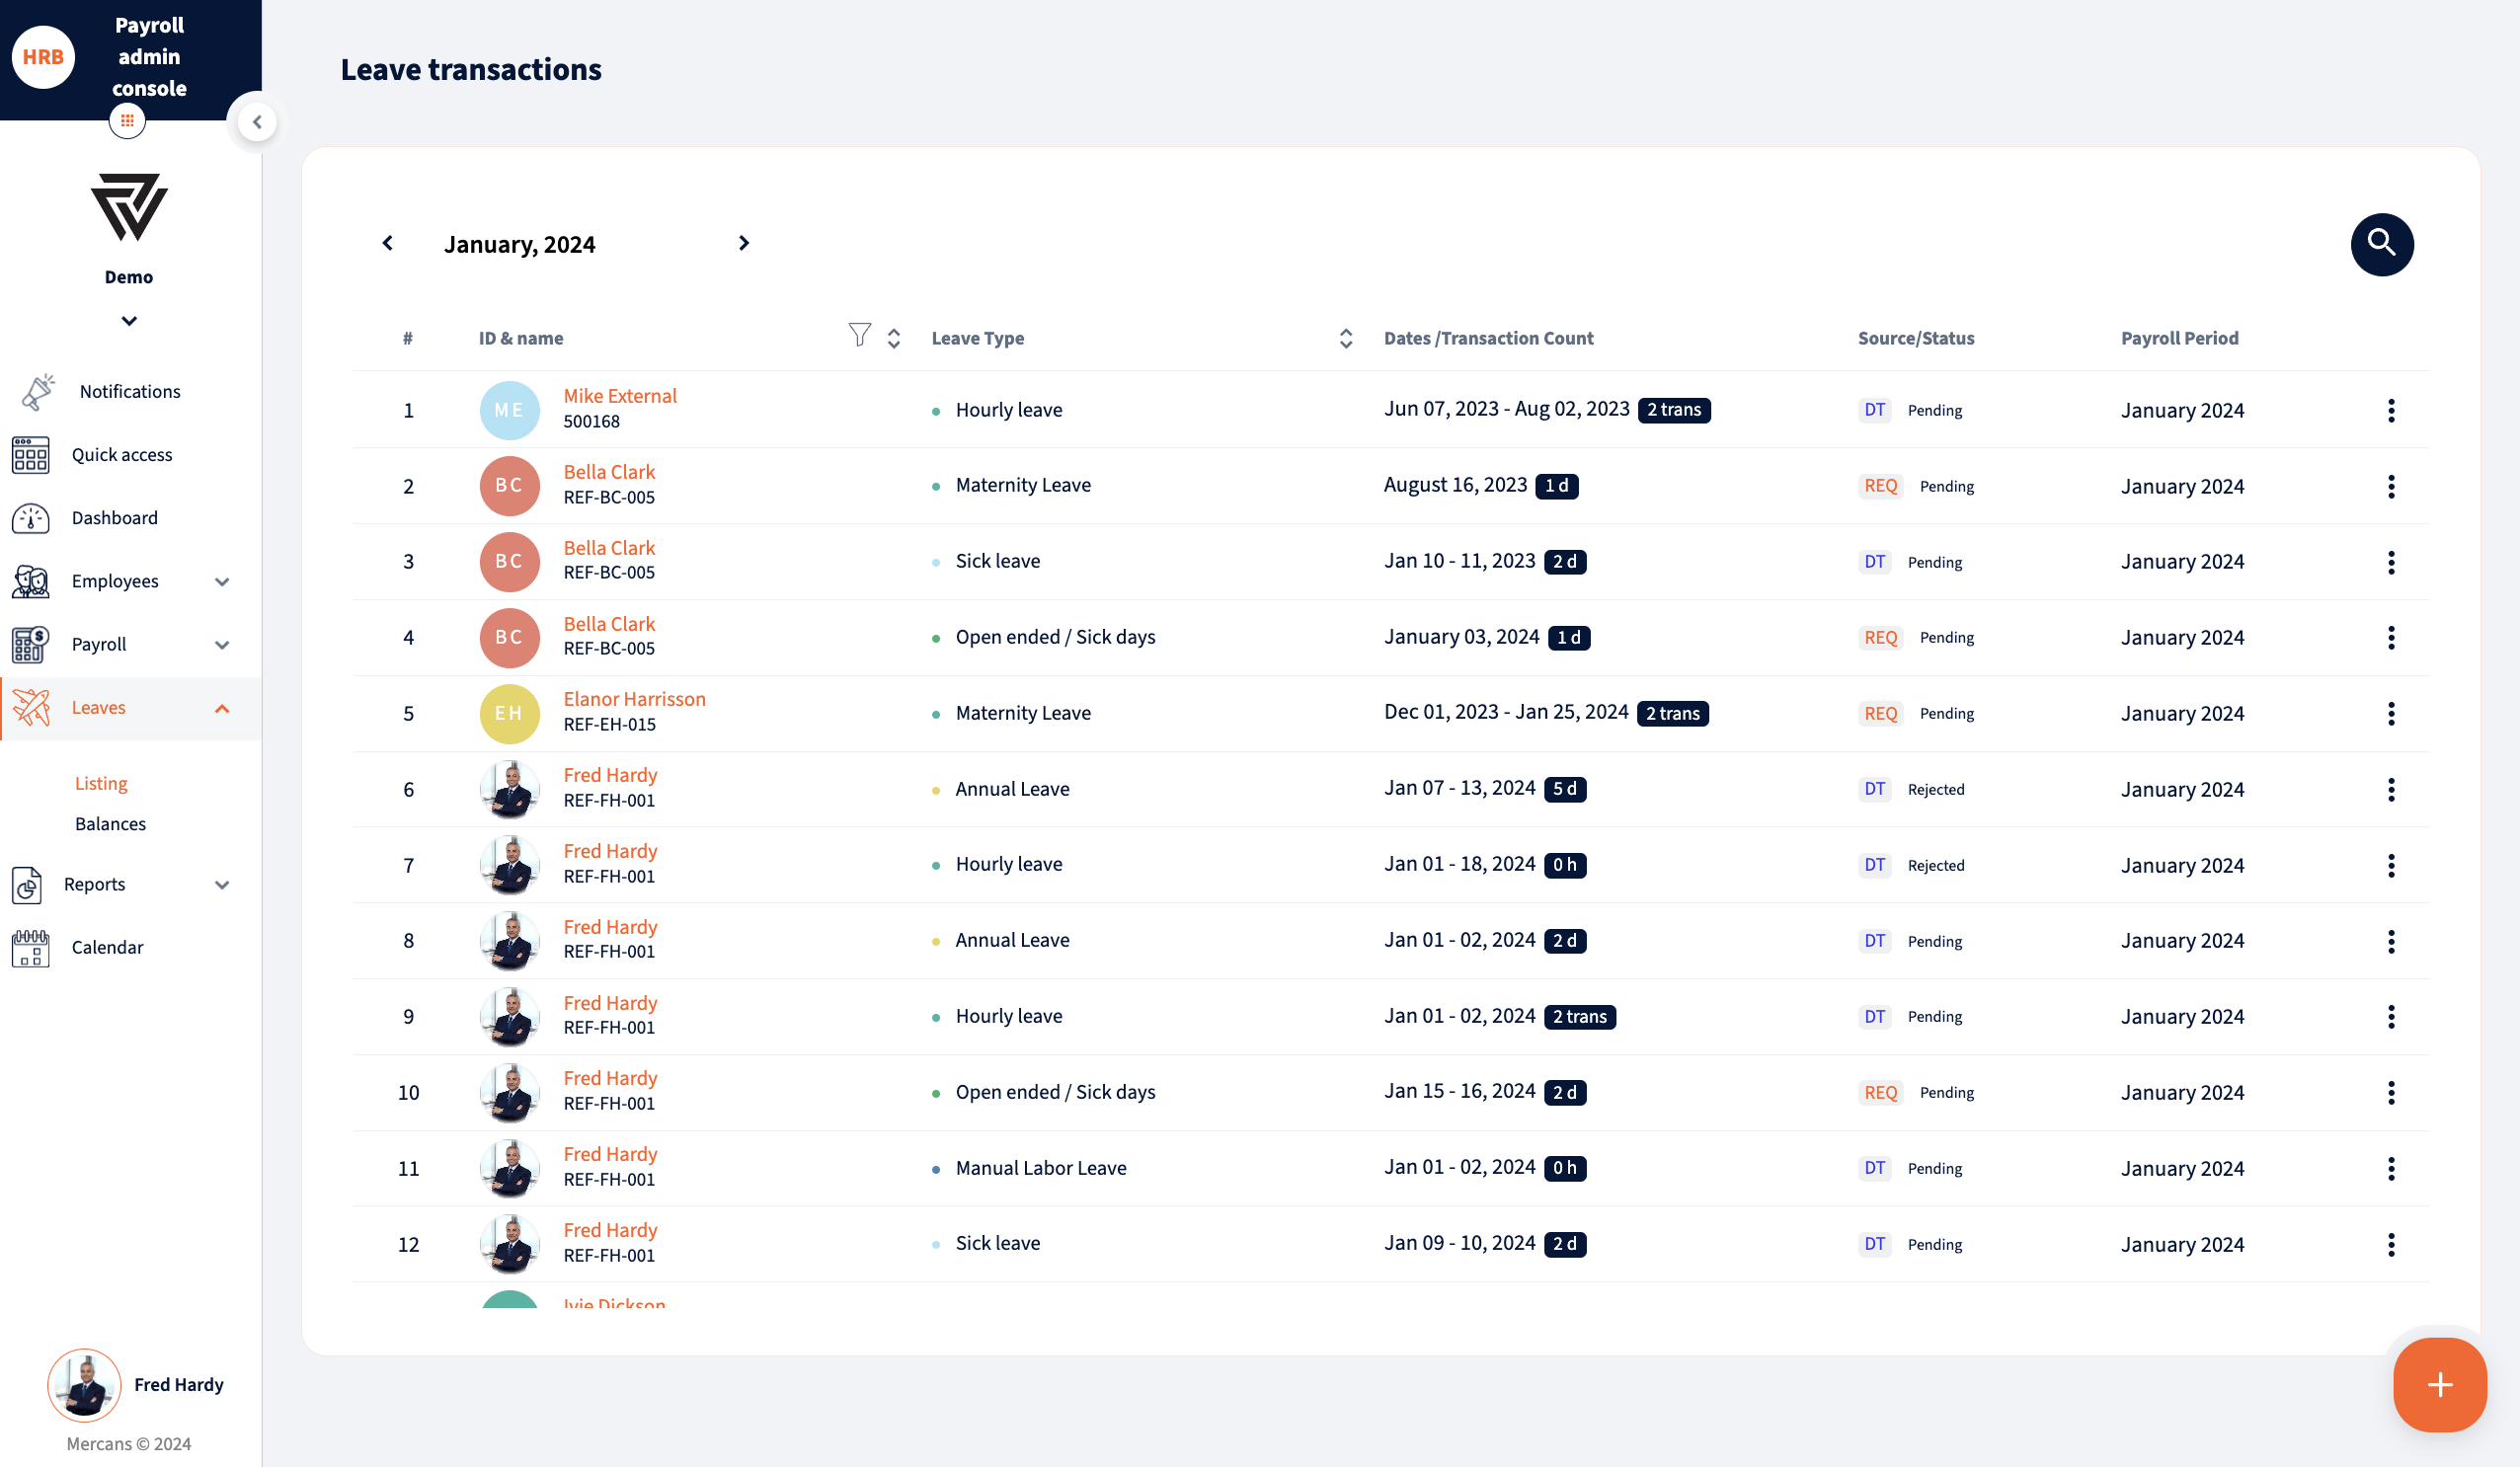
Requested and approved leave transactions
In this section, you can approve and reject leave transactions and request new leave transactions for employees.
To view current period employees’ requested leaves transactions, navigate to the Leaves page on the sidebar menu;
- Whether the transaction is approved or not, can be seen from the Source column

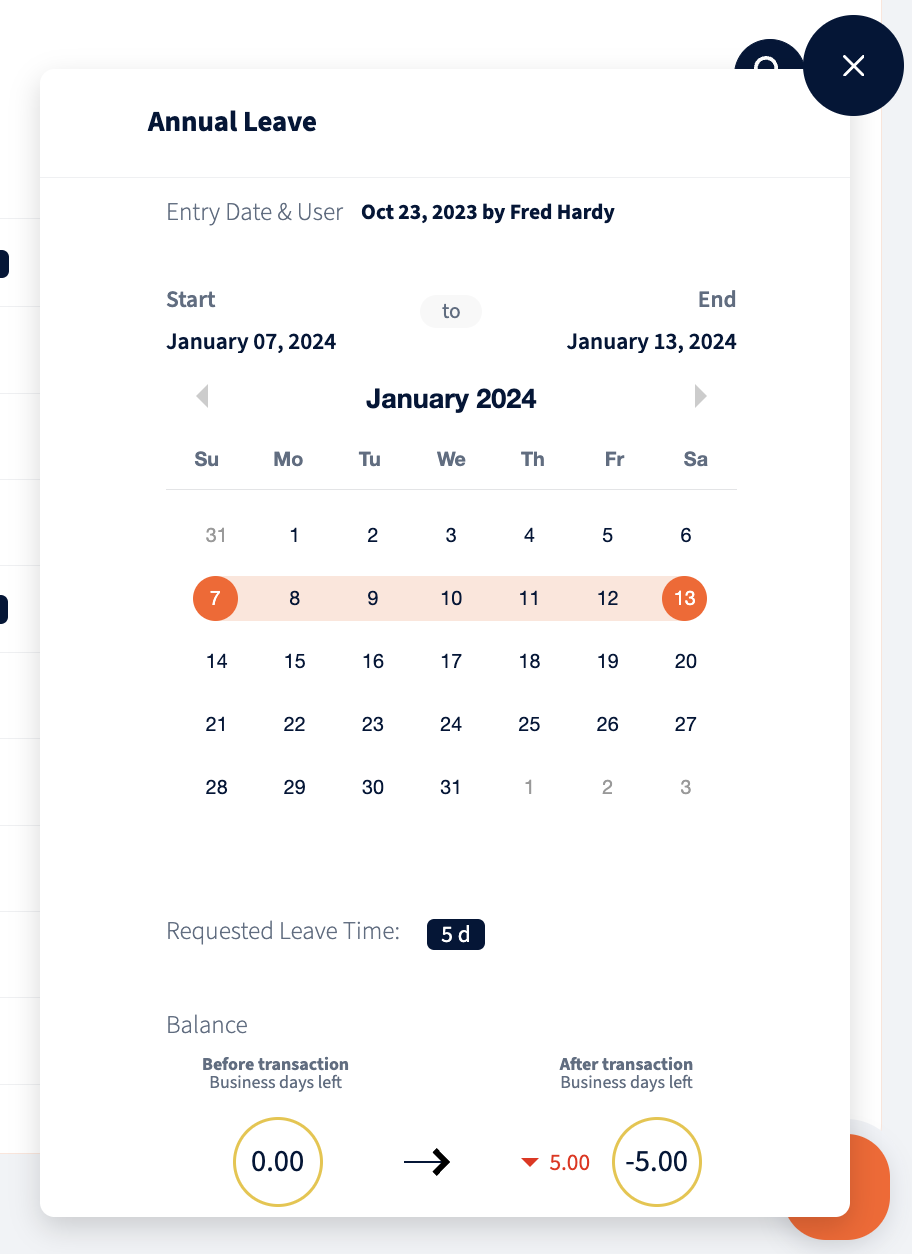
- To see and edit leave request, click on the request
- On the top left corner, you can see leave type
- On the top right corner, you can see whether the request has been approved or not
- When the request is not approved, dates can be edited by clicking on “Edit” next to “Leave Details”
- If the leave has balance, it is shown under the “Requested leave time”
- From the bottom right corner, the request can be approved or rejected. If the request has already been approved then it can be rejected.
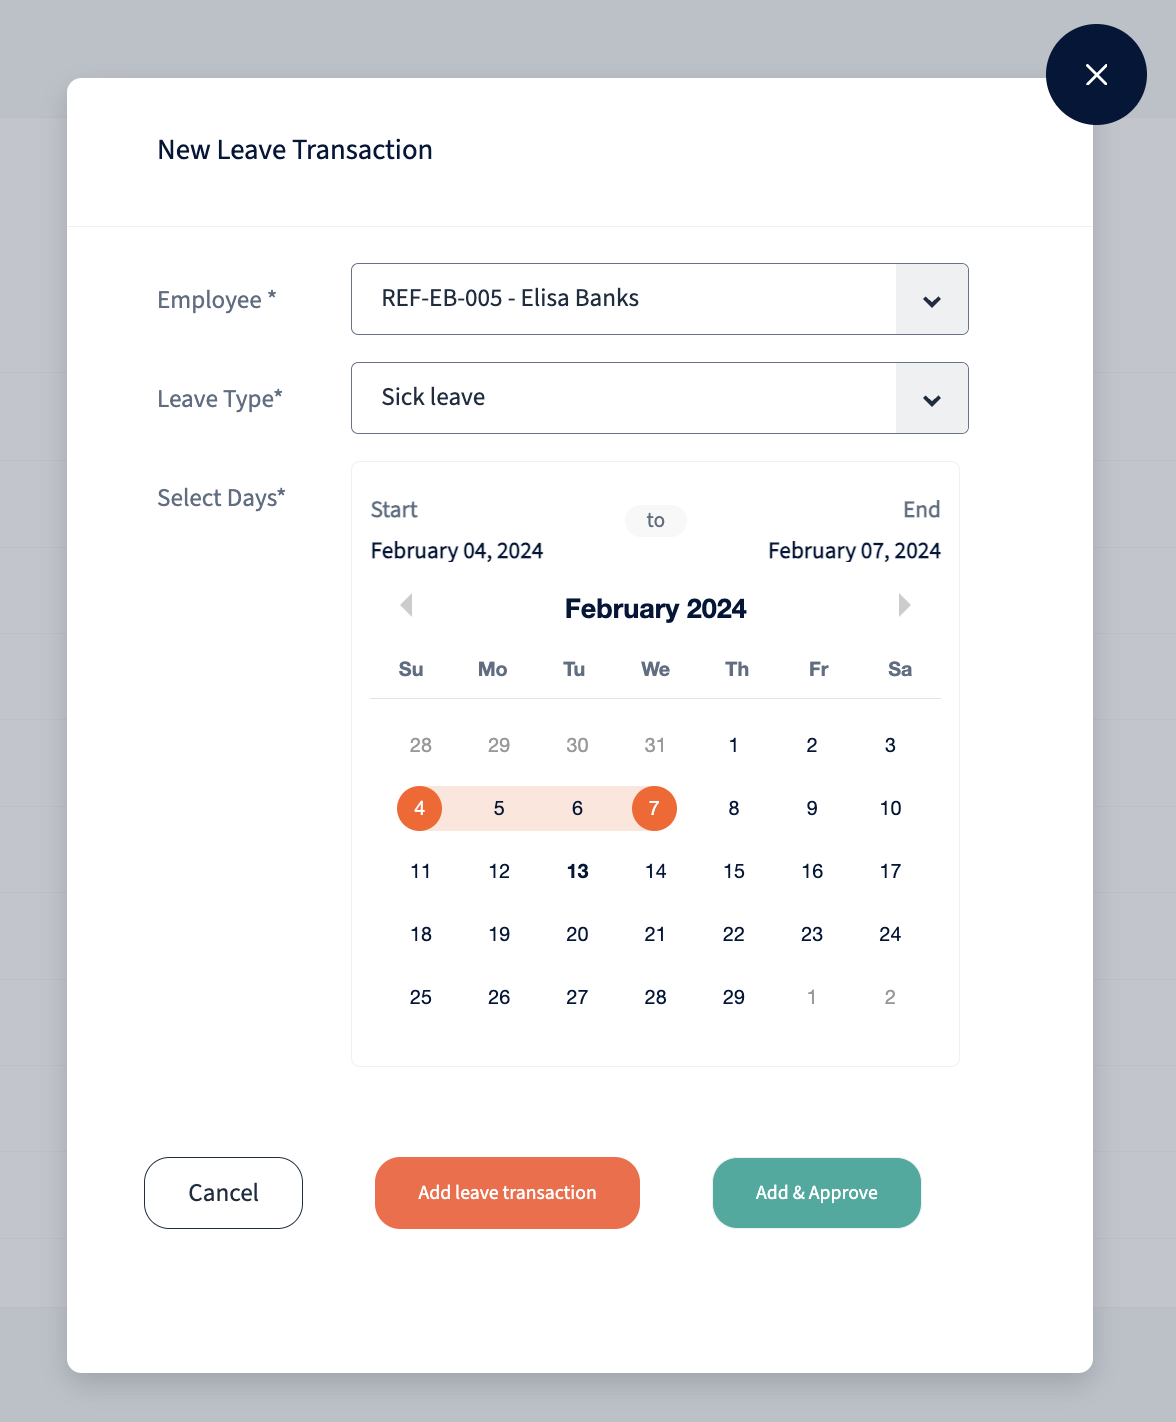
Creating a new leave transaction for an employee
- To make a request for any employee, navigate to the Leaves page on the sidebar menu;
- Click on “New Leave” on the top right corner of the page;
- Fill the data fields in the following modal
NB! *Asterix sign* next to each field name is mandatory and must be filled in order to activate the employee.
- Employee you want to make the request for;
- Leave Type;
- Select leave time;
- You can add a leave transaction request to be approved by clicking the “Add Leave” button or approve it right away by clicking the “Add & Approve”
Employee balances
- To view and edit employees leave balances, navigate to the Leaves page on the sidebar menu;
- Go to the “Balances” tab;
- For leaves with balance, total days are displayed per employee. On hover, used days per period is displayed as well;
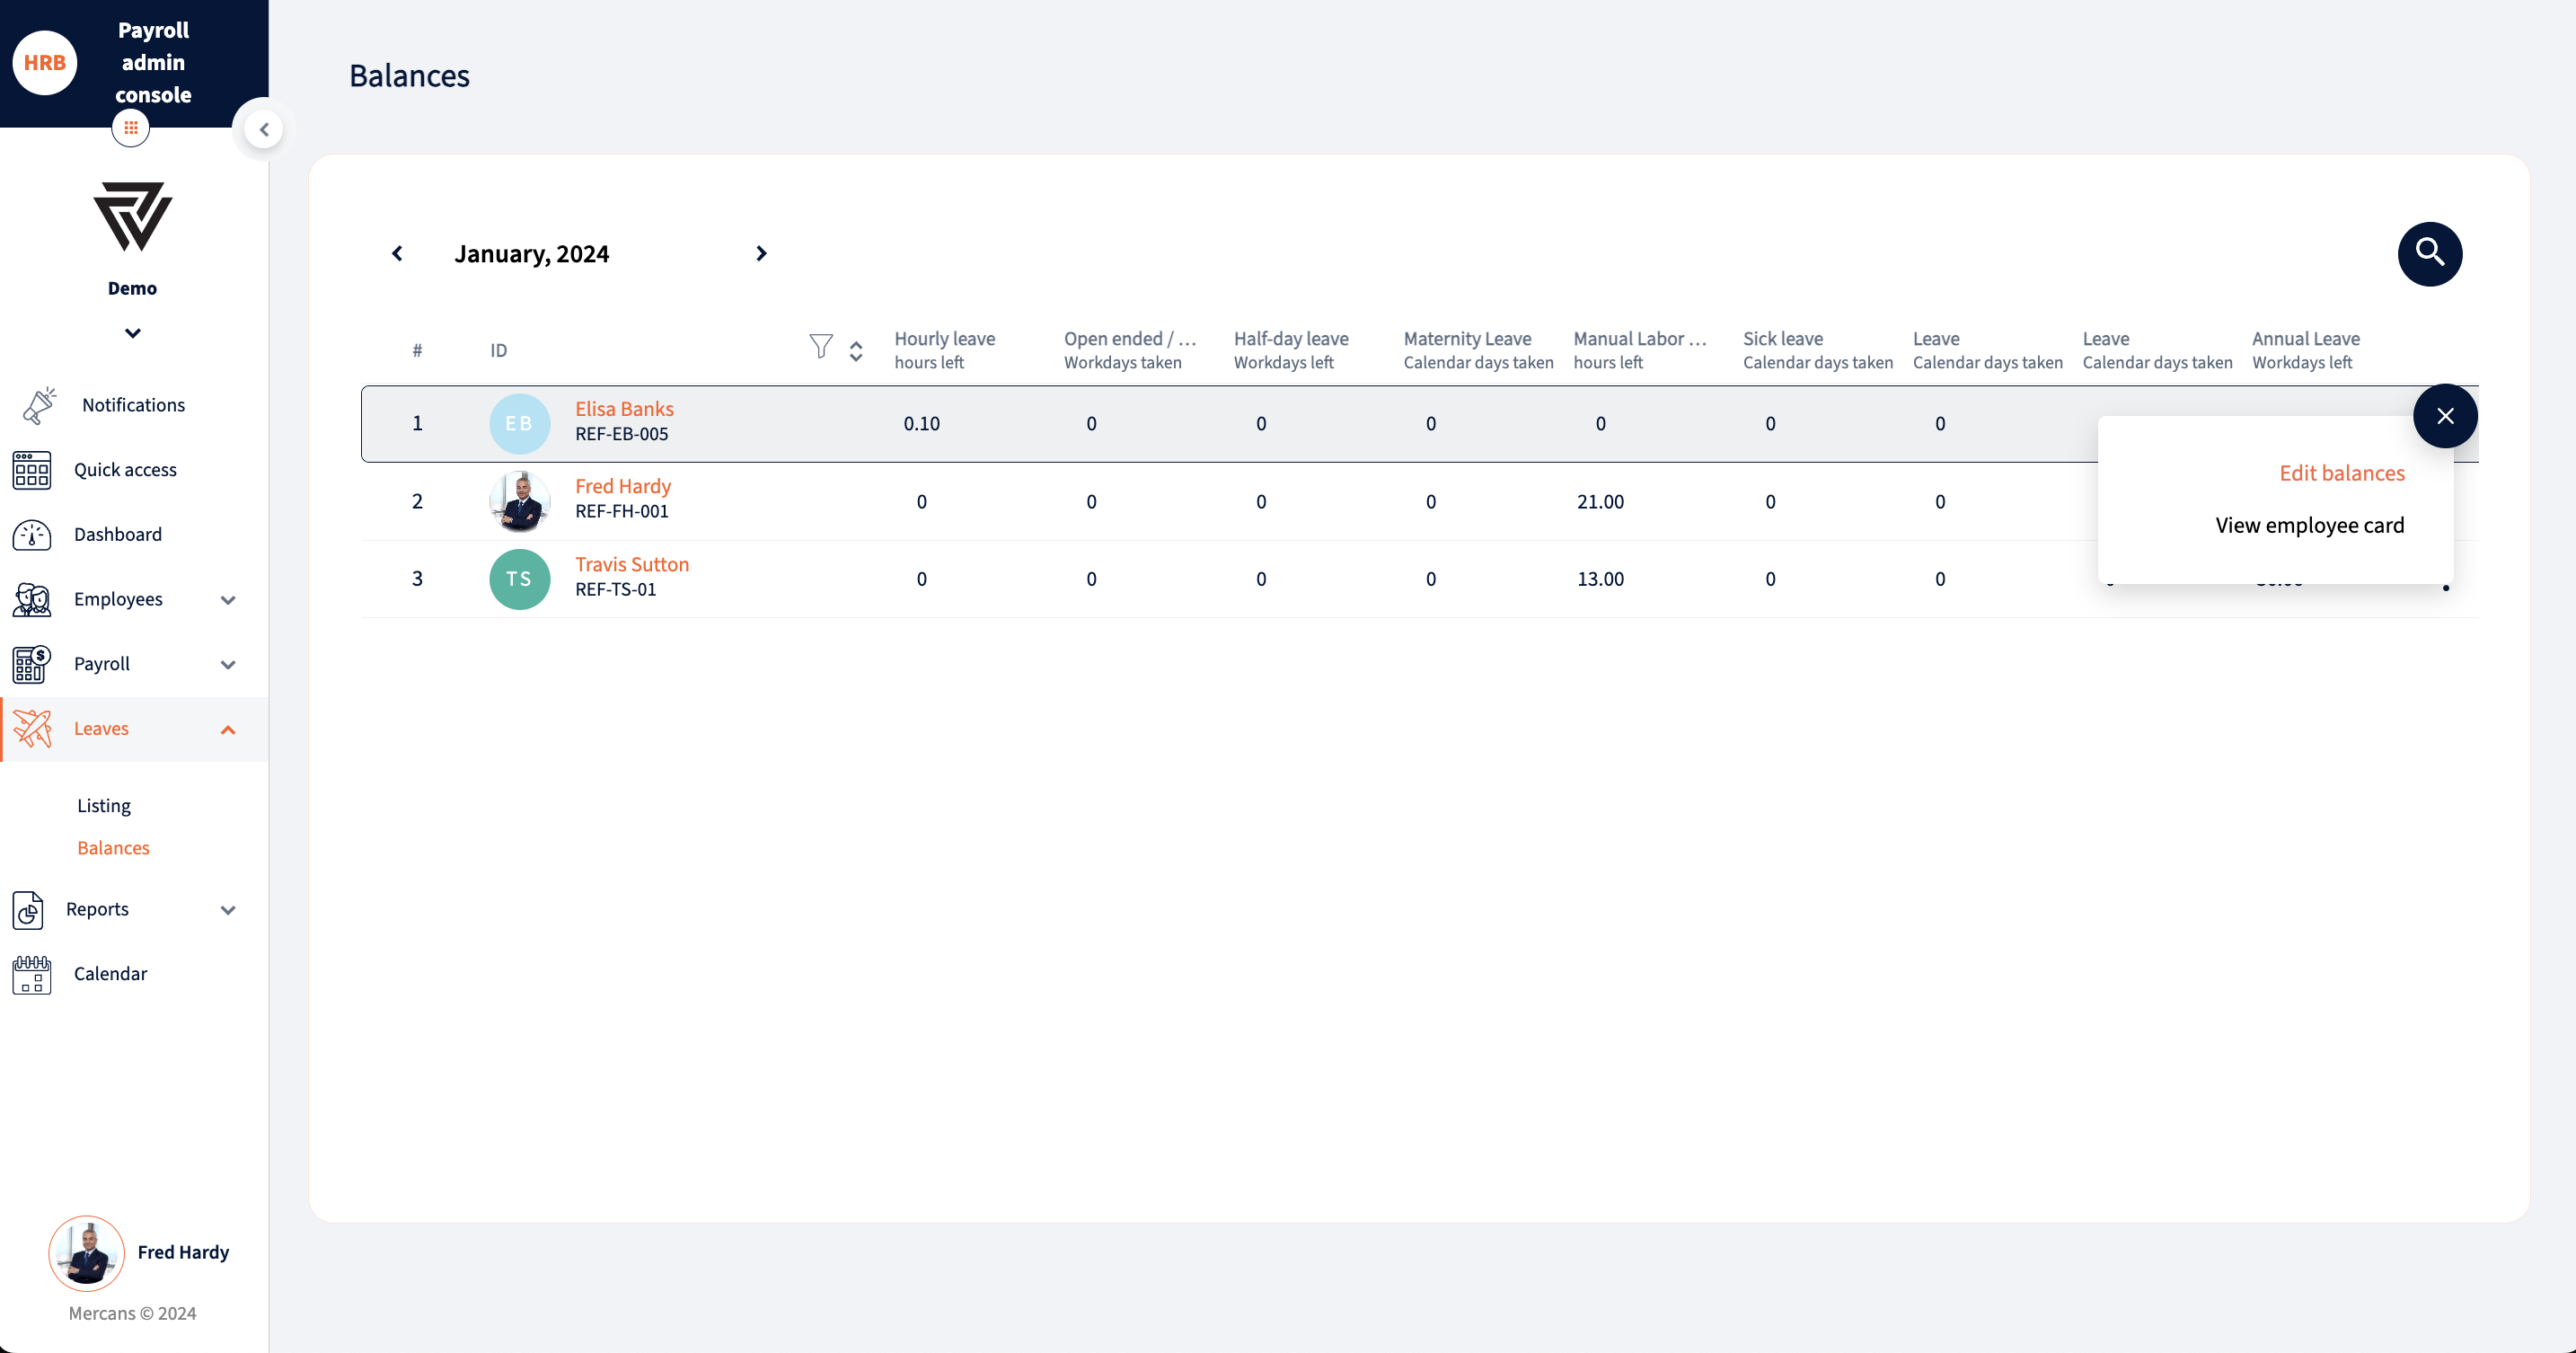
- To edit employee´s balance, click on the 3-dots;
- Click on “Edit balances”
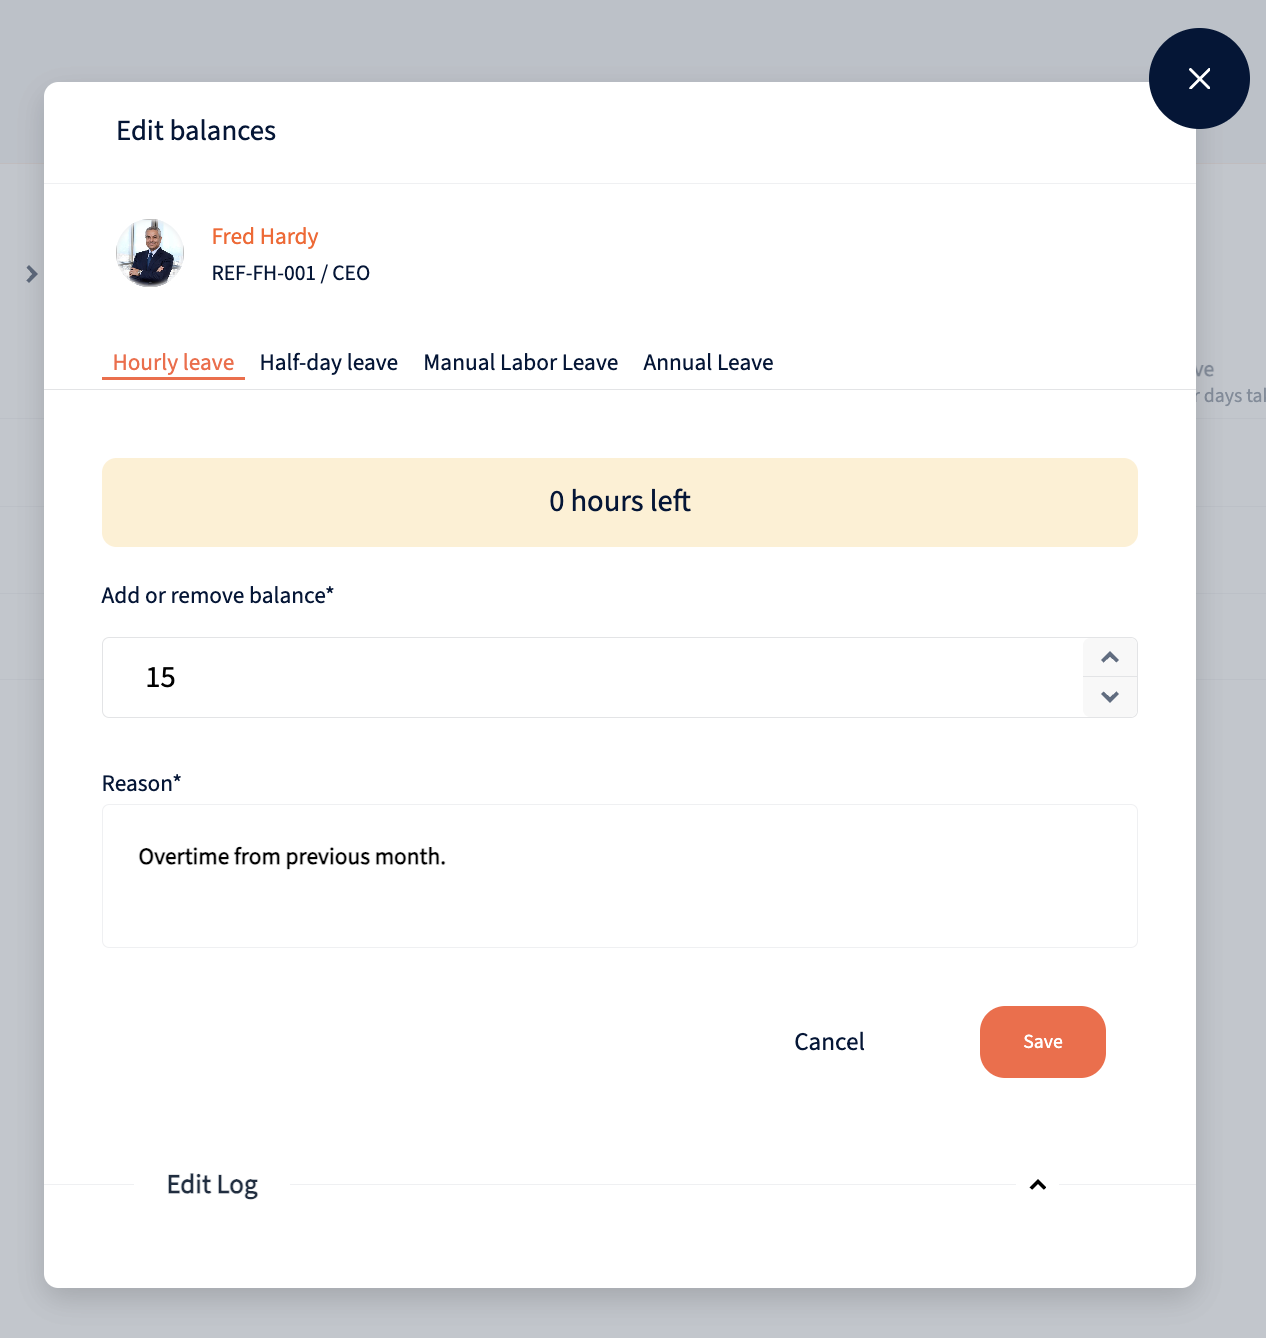
- Select which leave balance you want to change from tabs
- Fill the data fields in the following modal;
- To change leave balance, add on subtract days from current balance;
- Write a reason
NB! *Asterix sign* next to each field name is mandatory and must be filled in order to activate the employee.
- To see past changes to leave balances, click on the arrow next to “Edit log”
Was this page helpful?

We’re glad. Tell us how this page helped.

We’re sorry. Can you tell us what didn’t work for you?
Newsletter
Simplifying employment tasks worldwide.
Let us help you make sure you’re on the right track. Join 15,000+ subscribers and receive exclusive tips and resources.