Documents
The Documents module is a module that is located in both PAC and ESS.
In PAC it is possible to:
- Prepare templates and generate documents from templates
- Generate documents from scratch or import existing documents
- Send documents out for reviewing and signing
In ESS it is possible to:
- Review the documents – approve & reject
- Sing the document
Templates
In the template view it is possible to create templates. Templates are not attached to any employees; this is what differentiates templates from documents because documents are generated for some specific employees.
Templates can be created two ways by importing existing templates or starting template from scratch.
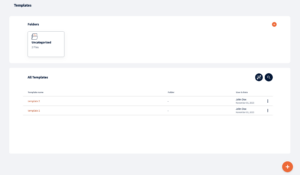
Template creation from scratch
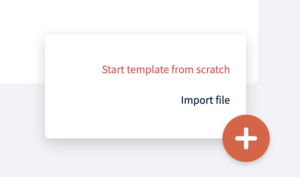
Clicking on the “Create template from scratch” button template editor view will open up.
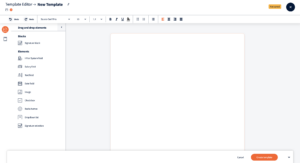
Editor view has all the basic functionalities that text editors support.
Firstly, there is a toolbar at the top of the page that has all the text formatting related settings.

From there users can pick font, font size, line height, text formatting settings, lists, and lastly text alignment settings.
Also it is possible to rename a template by clicking on a pencil icon next to the template name.

In addition view contains a left side section from where it is possible to add elements and configure header and footer related settings.
Elements
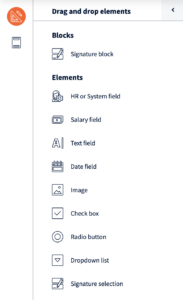
These are all different elements that can be used inside the template. Elements are important so that once the document is generated for a specific employee then these elements’ values will be populated with information about that employee.
HR or System field – this element contains all the information from the employee card, any field can be picked.
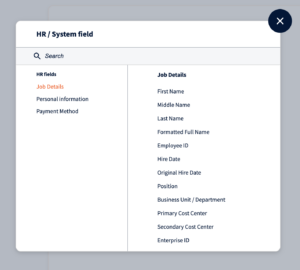
HR or system fields added to template look like this:

Salary field – allows to show pay element values in the document.
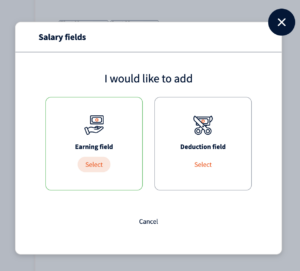
First the user has to pick earnings or deductions and later correct pay elements will be shown.
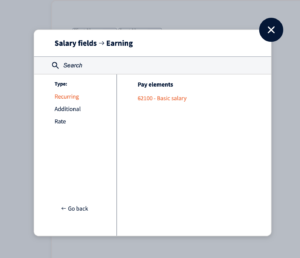
Salary field added to template looks like this:
![]()
Text field – can be used when there needs to be some text that is filled on document creation, can be any text.
![]()
Date field – used to fill the date once sending the document out. Date field has ability to define different date formats.
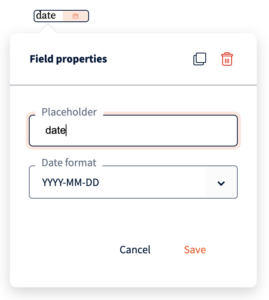
Image field – allows to add image


Checkbox – allows to select multiple values when sending out the document.
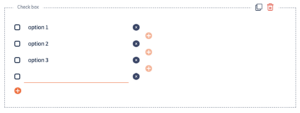
Radio button – allows to select one value from multiple values before sending out the document.

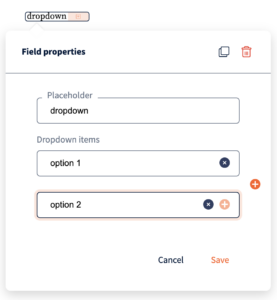
Dropdown list – allows to select one value from multiple before sending out the document.
Signature section – allows to add a single signature in ESS when signing.
Header and footer
Header and footer settings contain elements that can be added to header and footer and page numbering functionality.
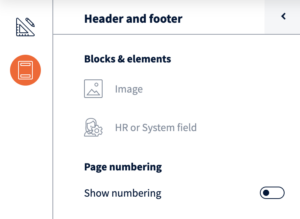
Header and footer can be added by double clicking on the top/bottom of the page.

Once the header is active, Image, Hr and System fields and plain text can be added to the header.

Page numbering can be added to the footer. Once numbering is enabled additional settings will be displayed to the user.
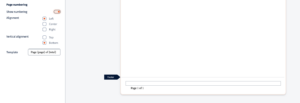
It is possible to define how page numbering is aligned, whether it is on top or bottom of the footer and define the format of how numbering is going to be displayed.
Now the template can be saved and if needed, a document can be generated from it.
Importing the template
Templates can be imported from the computer. By clicking on “Import file” import template modal will open up from where file can be selected.
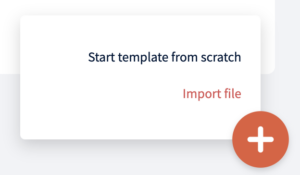
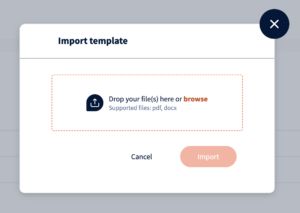
After importing, all the text from the document should be there in the template editor and if needed it is possible to apply font changes, add elements, headers and footers.
Please note that it will not always look identical to the original uploaded document.
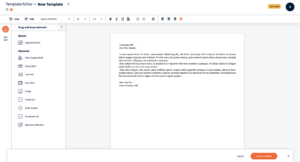
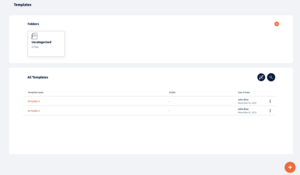
Saved templates will be displayed in the all templates section. It is possible to edit saved templates, new changes will apply for the new documents generated from templates. Documents generated from the old templates version will stay as they were.
Documents
In the documents view it is possible to create documents. Documents can be created from scratch and imported. On creation document requires an employee to be selected who is the recipient for that document. Recipient means that this document is created for that employee.
Documents can be created two ways by importing existing documents or starting a document from scratch.
Document creation from scratch
Clicking on the “Create document from scratch” button document editor view will open up.
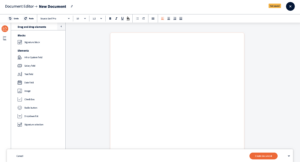
Editor view has all the basic functionalities that text editors support.
Firstly, there is a toolbar at the top of the page that has all the text formatting related settings.

From there user can pick font, font size, line height, text formatting settings, lists, and lastly text alignment settings.
Also, it is possible to rename a document by clicking on a pencil icon next to the document name.

In addition, there is a left side section from where it is possible to add elements and configure header and footer related settings.
Elements

These are all different elements that can be used inside the document. Elements are important so that once a document is generated for a specific employee then these elements’ values will be populated with information about that employee.
HR or System field – this element contains all the information from employee card.

HR or system fields added to template look like this:

Salary field – allows to show pay element values in the document. Salary field will be updated with a value from the employee card once the document is generated.

First, the user has to pick earnings or deductions and later correct pay elements will be shown.

Salary field added to template looks like this:
![]()
Text field – can be used when there needs to be some text that is filled on document creation, can be any text.

Date field – used to fill the date once sending the document out. Date field has ability to define different date formats.

Image field


Checkbox – allows to select multiple values when sending out document.

Radio button – allows to select one value from multiple when sending out the document.

Dropdown list – allows to select one value from multiple before sending out the document.

Signature section – allows to add a single signature.

Header and footer
Header and footer settings contain elements that can be added to header and footer and page numbering functionality.

Header and footer can be added by double clicking on the top/bottom of the page.

Once the header is active, Image, Hr and System fields and plain text can be added to the header.

Page numbering can be added to the footer. Once numbering is enabled additional settings will be displayed to the user.

It is possible to define how page numbering is aligned, whether it is on top or bottom of the footer and also define the format of how numbering is going to be displayed.
Importing the document
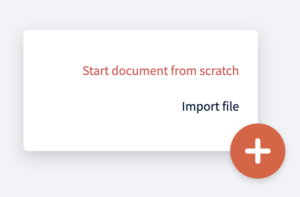
Documents can be imported from the computer by clicking on “Import file” import document modal will open up from where file can be selected.
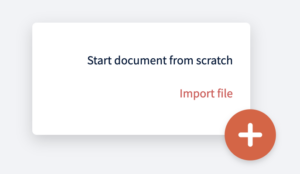
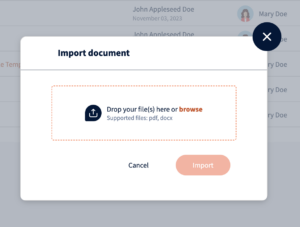
After importing all the text from the document should be there in the document editor and if needed it is possible to apply some changes, add elements, headers and footers.
Please note that it will not always look identical to the original uploaded document.
Elements and signature blocks can be added to the uploaded document.
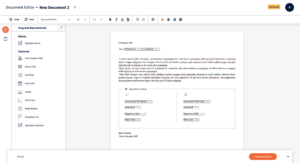
And now the only option is to click “Create document”, this will open up create document modal from where document name can be added, recipient for the document has to be set and request-type needs to be selected.
Request type defines the workflow that is used for this document. If there is only one workflow then this option will be preselected.
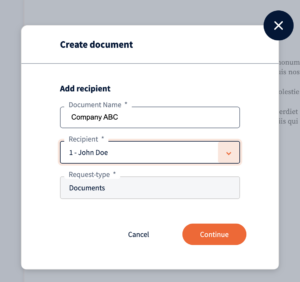
By clicking “Continue” draft document will be generated. User is redirected to the preview document view from where it is possible to fill elements and signature block values. Hr and System fields information will be pulled from the Employee card. If these fields are not filled on the employee card then information can be added manually.
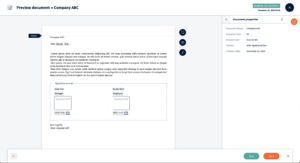
Once all the fields are filled and the document is prepared, it is possible to save it as draft or send it out.
Once the document is sent, a message will be displayed to the user and right side of the screen will be updated to display workflow steps.
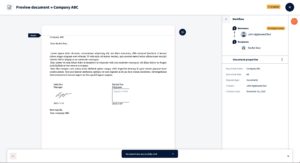
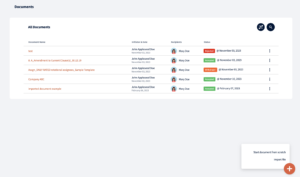
All the documents will be displayed in the All documents section.

We’re glad. Tell us how this page helped.
We’re sorry. Can you tell us what didn’t work for you?
Newsletter
Simplifying employment tasks worldwide.
Let us help you make sure you’re on the right track. Join 15,000+ subscribers and receive exclusive tips and resources.
