


 Login
Login

Adding new employee
To add a new employee, click on the + icon in the bottom right corner of the interface. Upon doing so, you will be prompted to choose between adding an employee manually or importing data from a file.
Changes in importing employee data
Important! The structure of the import file has changed. Instead of mapping specific pay elements, general pay element codes can now be used.
What Has Changed?
Previously, each pay element had a dedicated column for its value. Now, the import file includes a separate column for the pay element code, followed by a column for the pay element amount. This new structure makes it possible to import multiple pay elements in a single file, improving scalability and usability.
Previous file structure:

New file structure:

Some pre-configured templates must be updated to continue using them. See the manual for instructions on how to update them.
Importing employee data
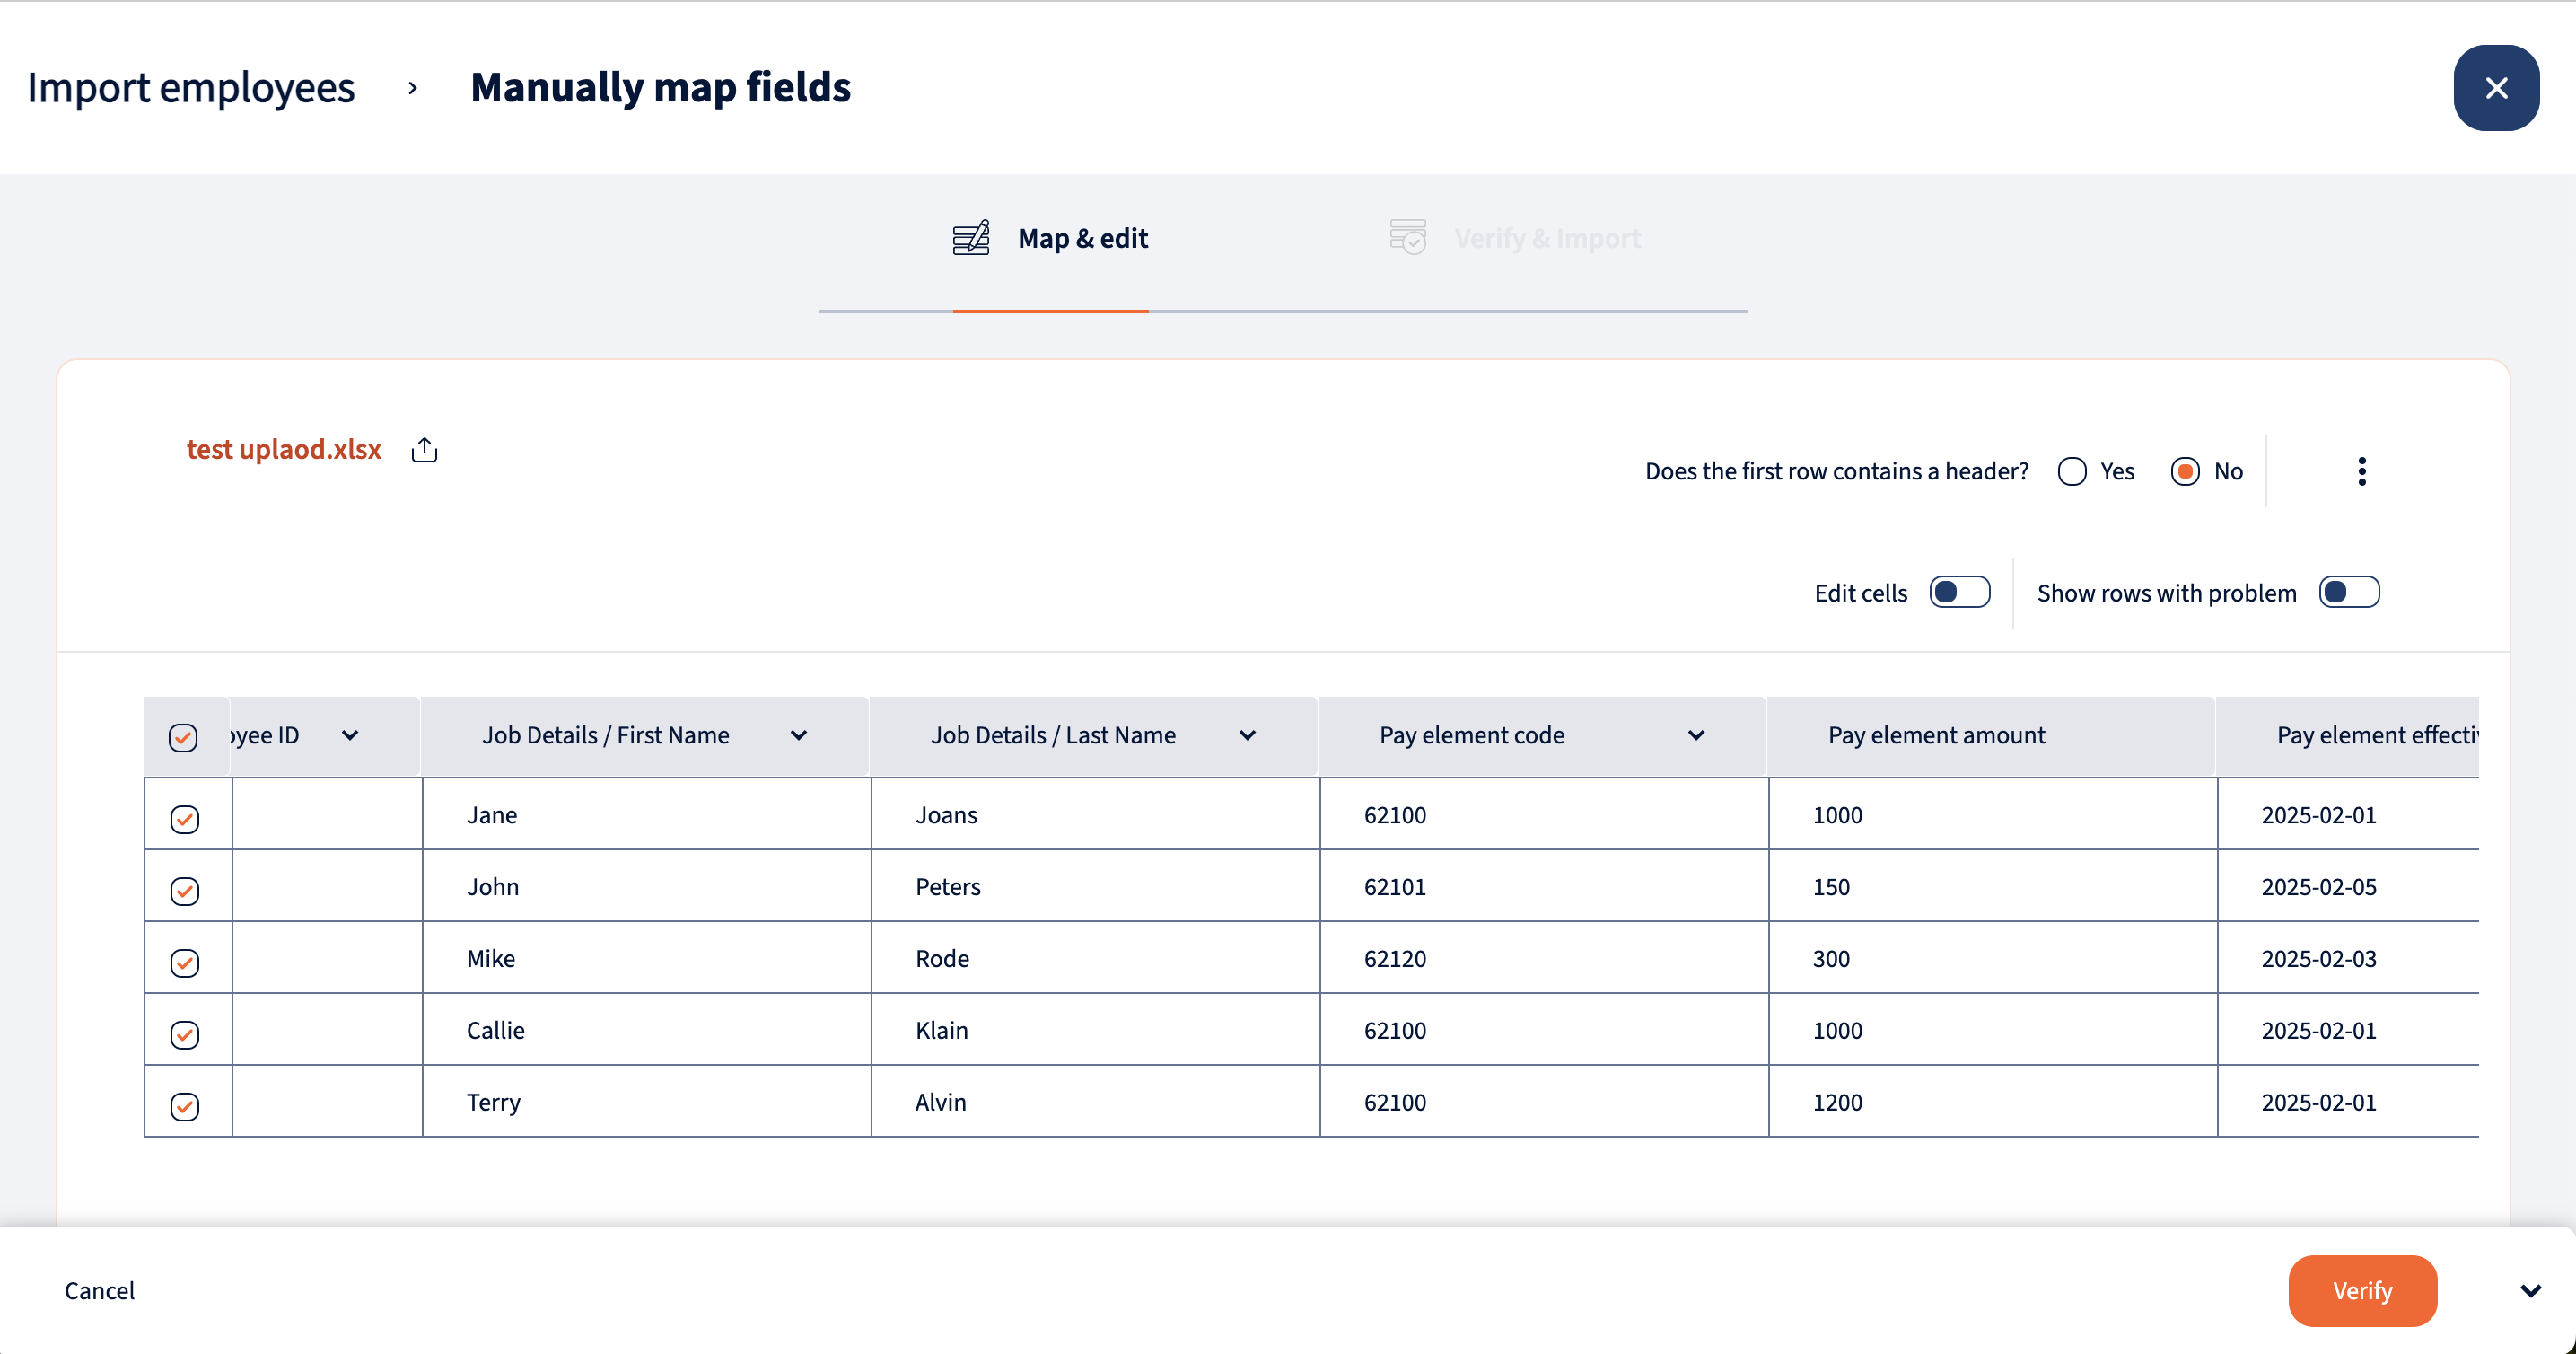
Select “Import employee data” to upload data in bulk. You’ll then be prompted to choose between using a template or manually mapping fields. Refer to the manual for guidance on creating a template if needed. Following this, you’ll be prompted to upload the file containing the employee data. Once uploaded, the file will be displayed, allowing you to map fields or review the pre-mapped ones. You can specify whether the first row should be treated as a header or part of the file’s data. Additionally, you have the option to edit the file. Fields with any issues will be flagged and can be filtered out for further review.
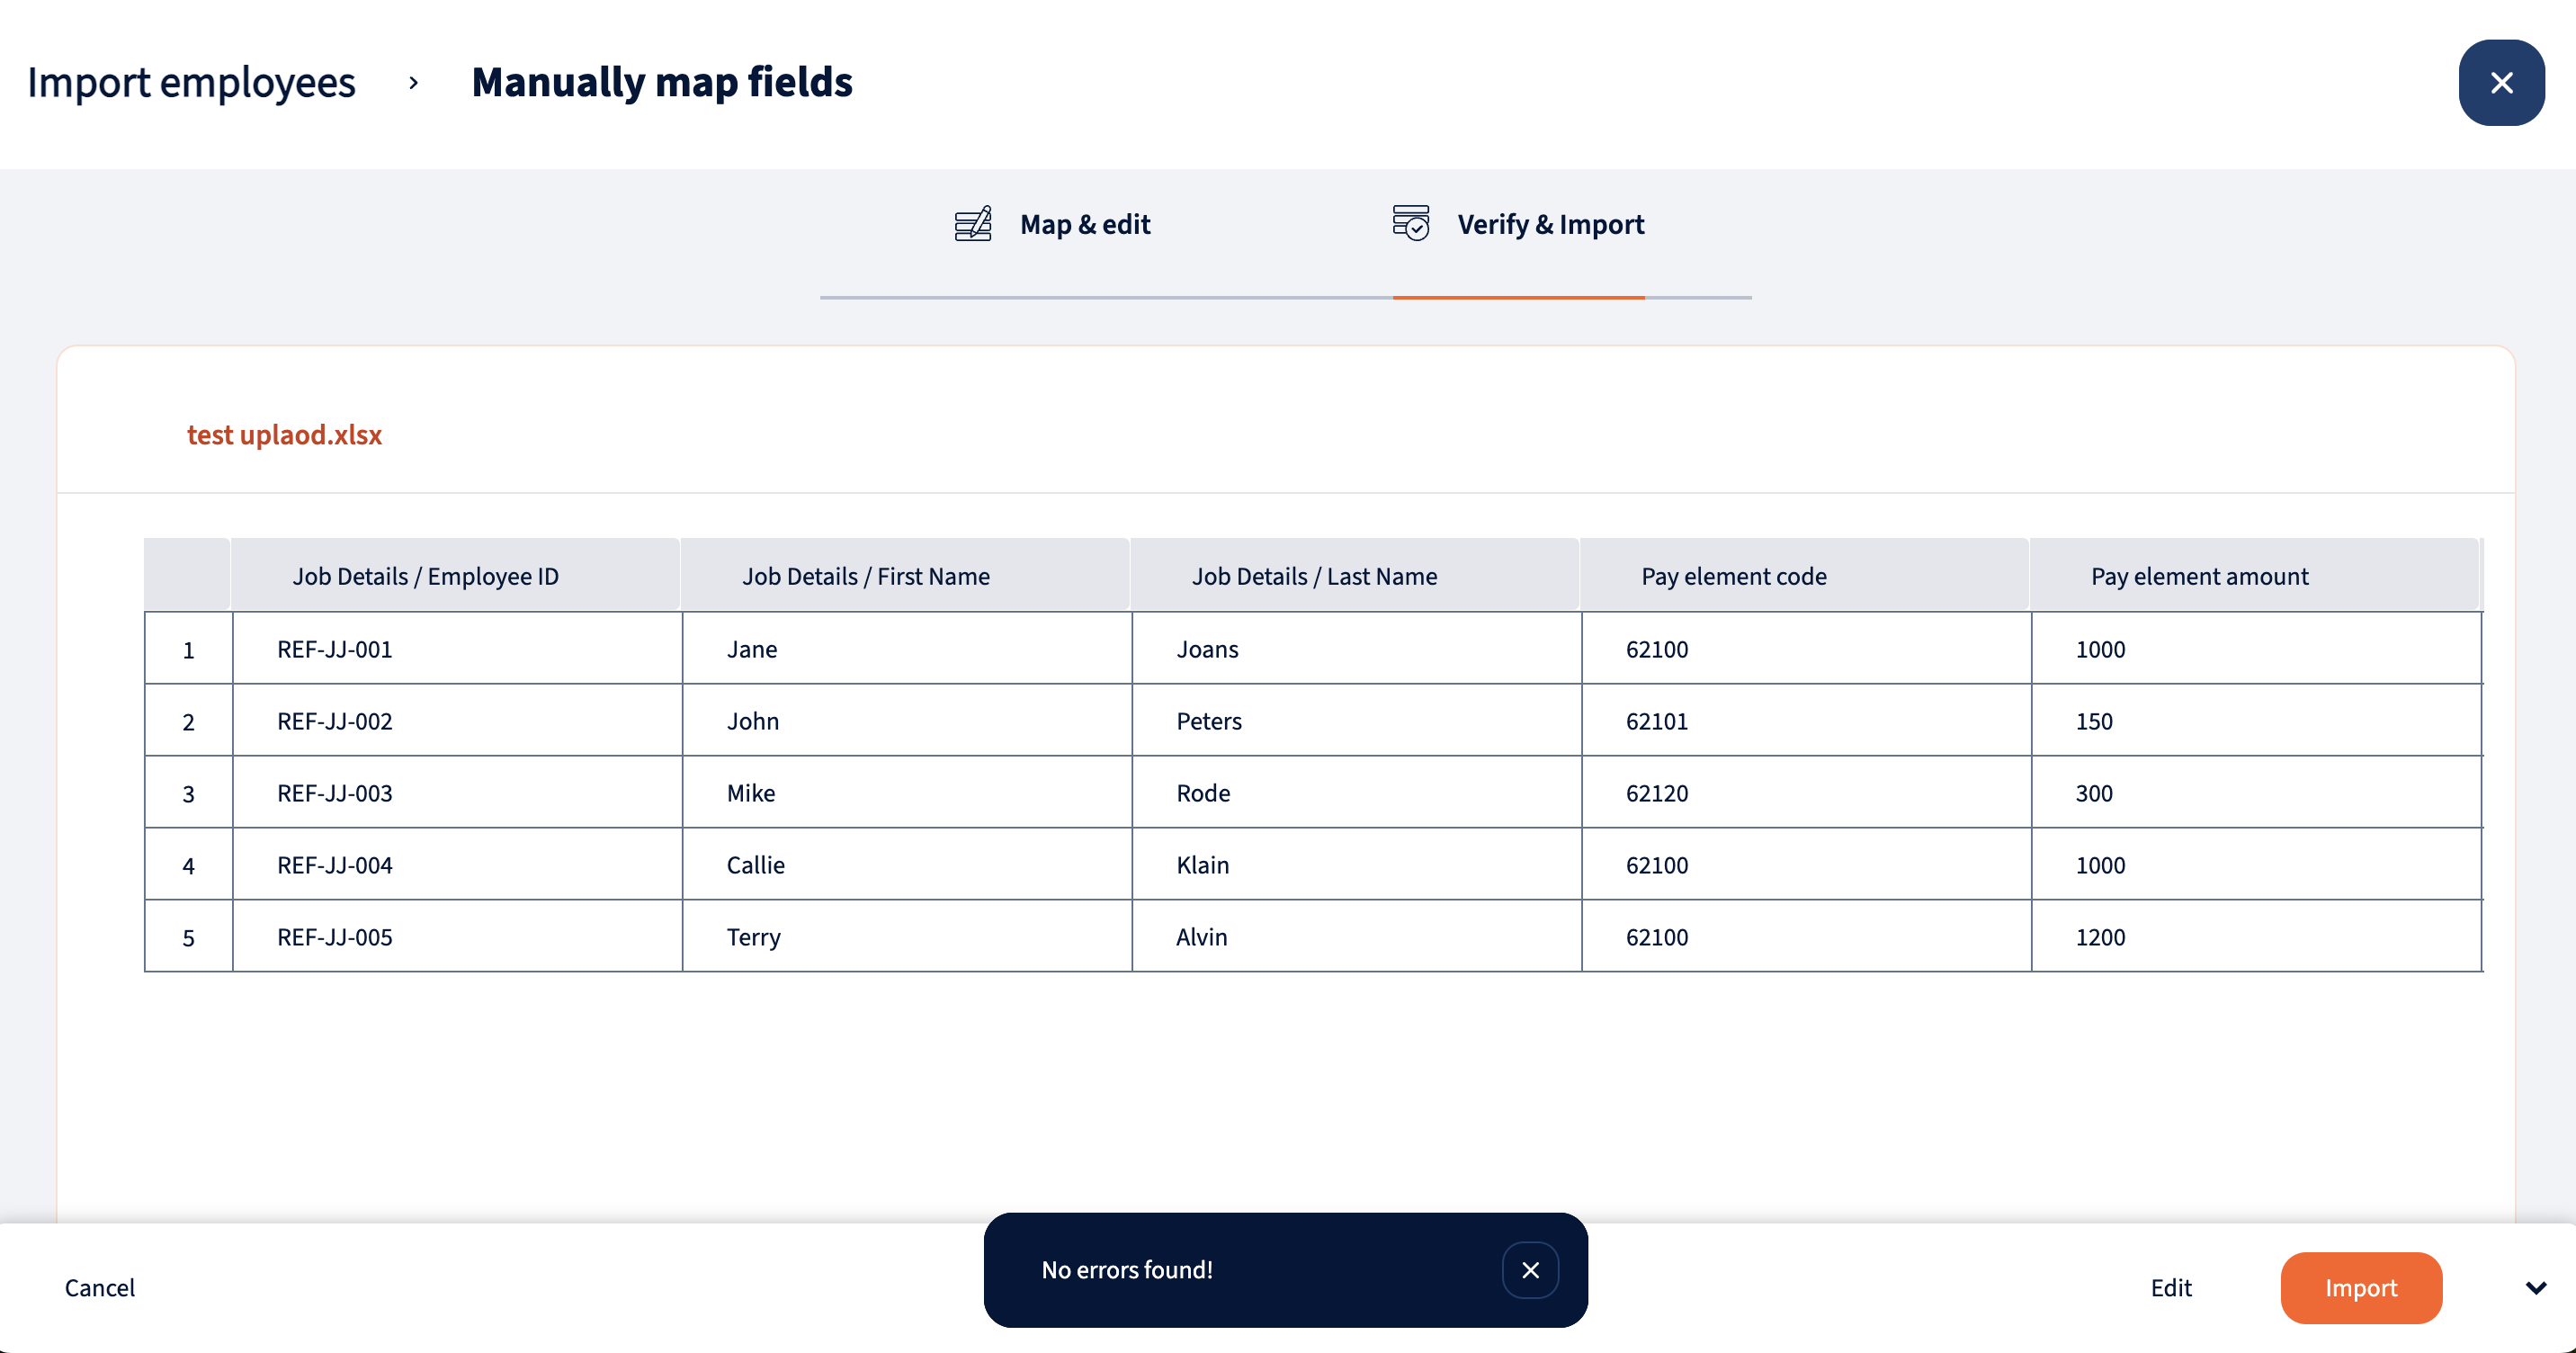
After ensuring that all data is accurate, proceed to verify the inputs. Additional validations will be performed, and any problems detected within the file will be marked and can be filtered out accordingly.
Upon successful completion of all validations, the file can be imported into the system.
Manual employee adding
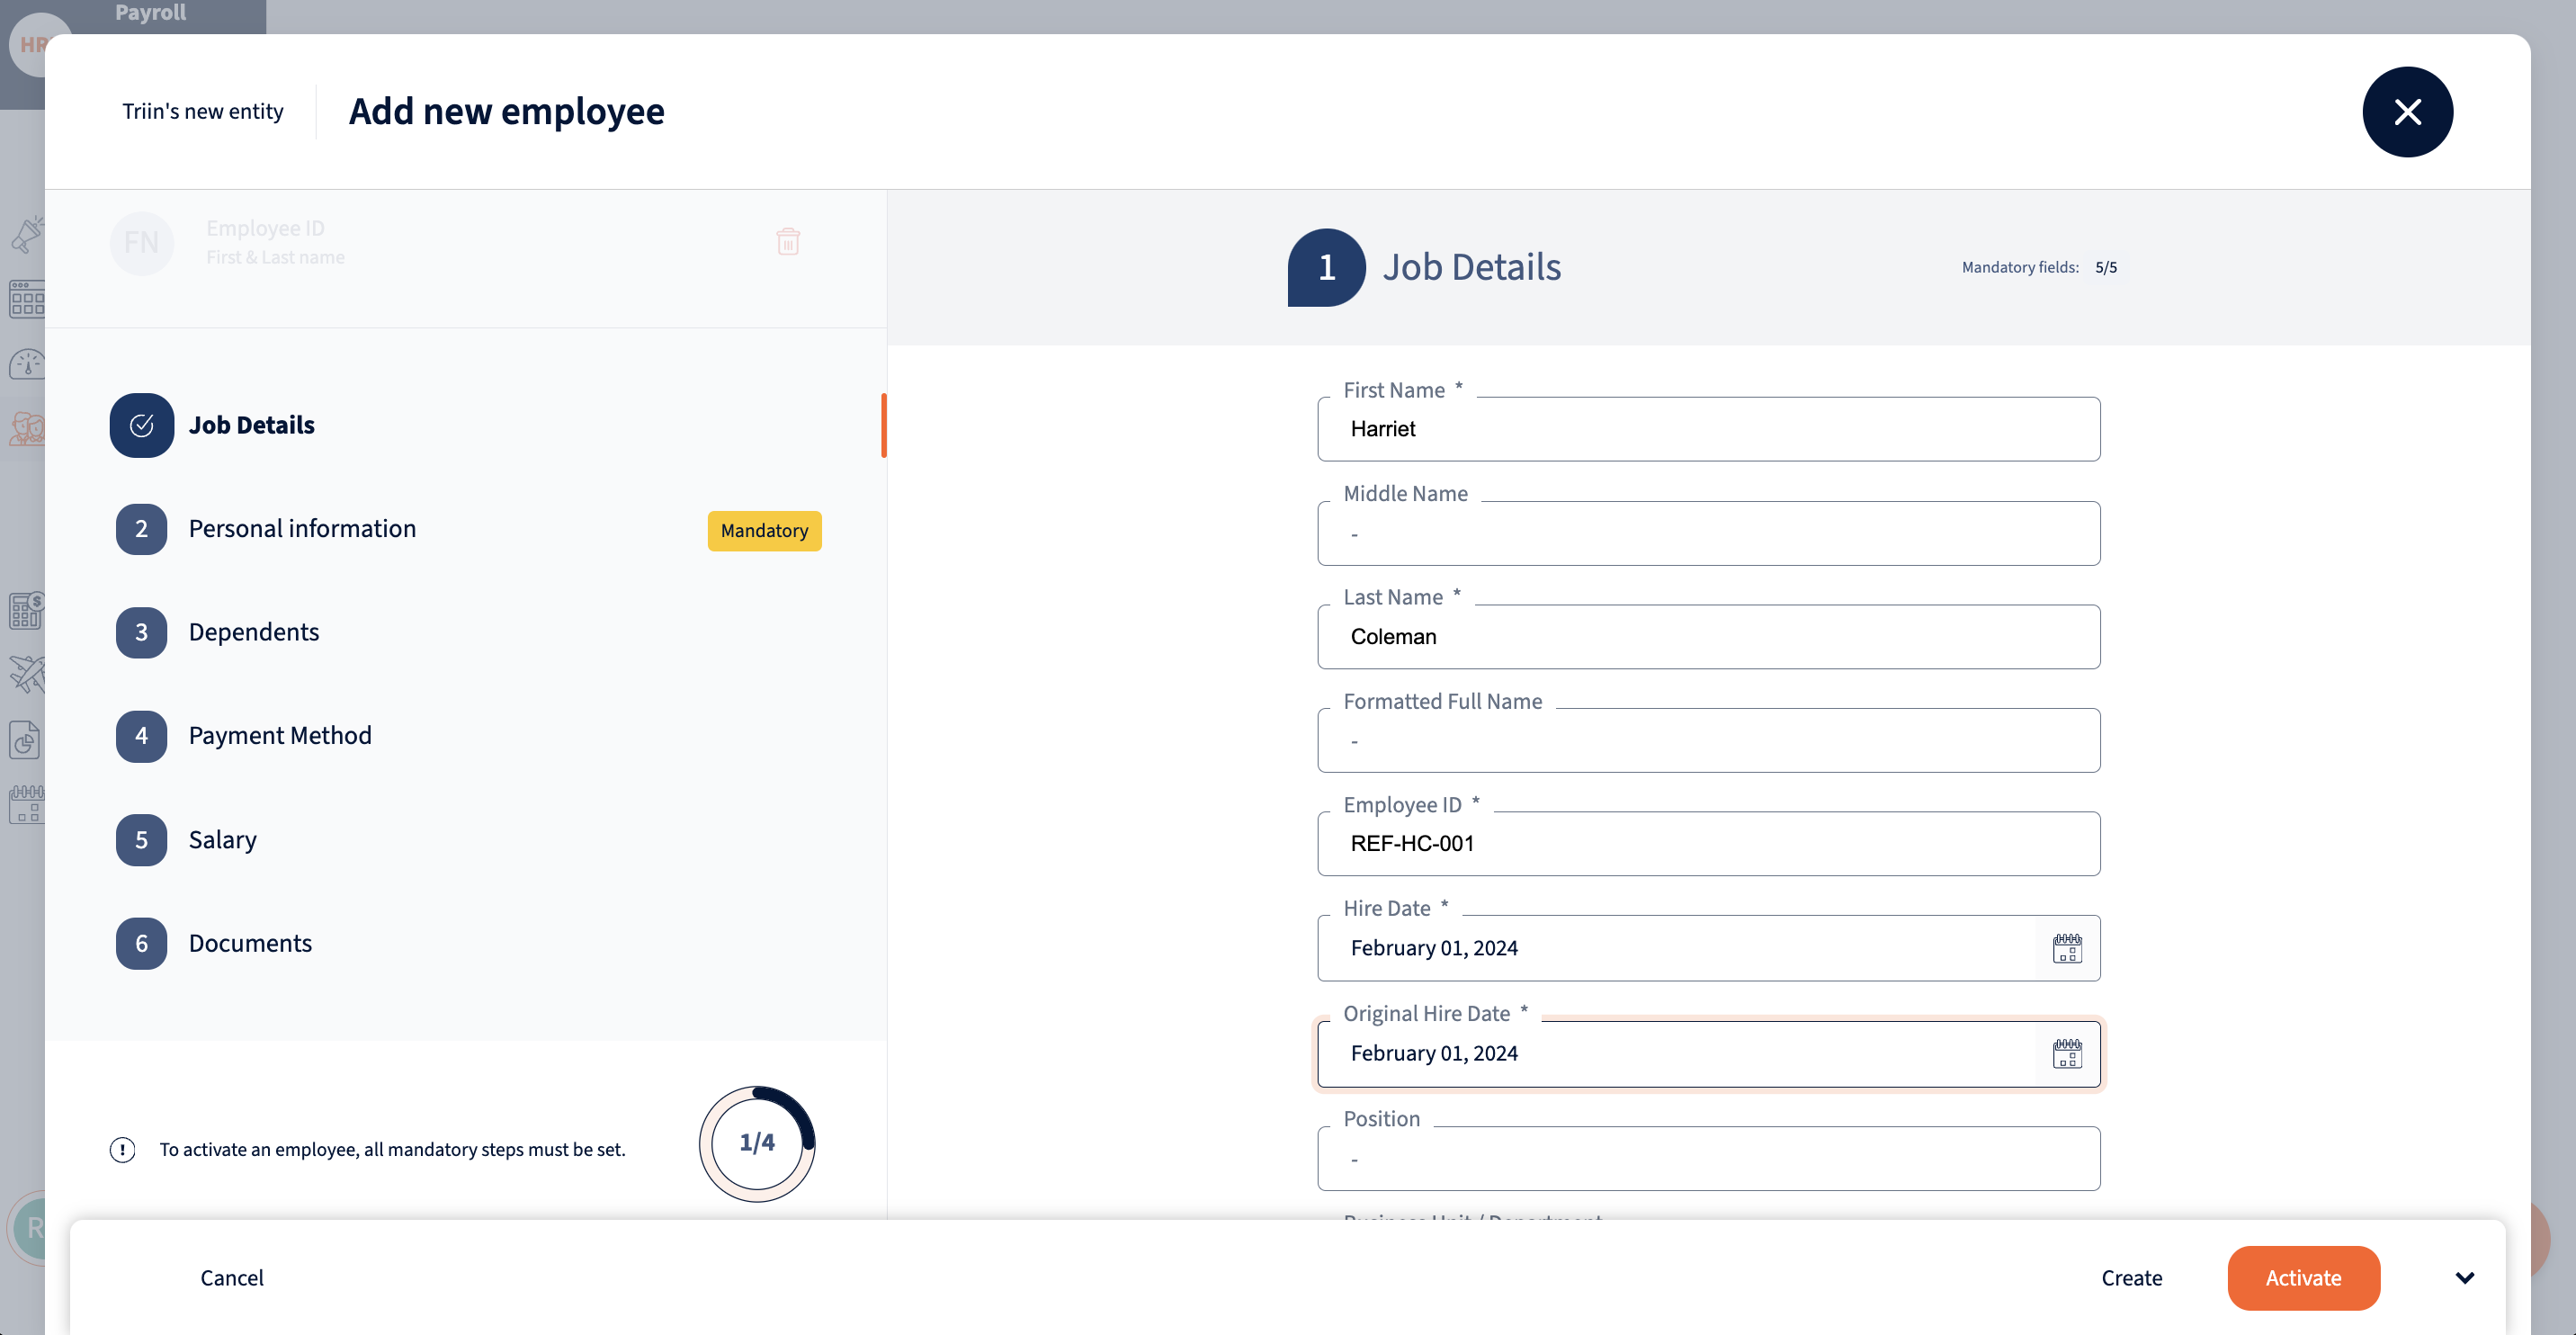
Alternatively, if you prefer to upload employee data in bulk, opt for “Add employee” to proceed with manual entry. A modal will appear, presenting a list on the left side of all available sections for data input. Any section with mandatory fields will be marked with a “Mandatory” tag next to its name. To create an employee, essential details such as first name, last name, and employee ID must be provided. Once these fields are filled, the employee can be created and will initially appear in draft status within the Draft tab. To activate the employee, ensure that all mandatory fields are properly filled out.

We’re glad. Tell us how this page helped.

We’re sorry. Can you tell us what didn’t work for you?
Newsletter
Simplifying employment tasks worldwide.
Let us help you make sure you’re on the right track. Join 15,000+ subscribers and receive exclusive tips and resources.